If you are on the lookout for fun STEAM activities for your kids to do, you can never go wrong with art activities. These are fun, and kids of all ages will love doing them!
There are so many activities that you can do with your kids. Where do you start? Did you know that you can do arts and crafts activities using nail polish? Don’t let your bottles of nail polish go to waste! Let your kids’ creativity flow by letting them play around with your nail polish.
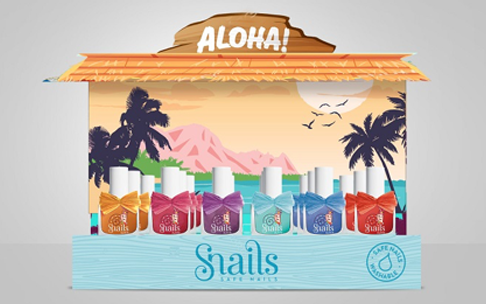
This Holiday season, you can give the kids this special Christmas pouch with their own bottle of Snails nail polish and stickers that they can use for decorating to easily match their art with the festive season! Snails nail polish is the first washable child nail polish in the world. It is a perfect choice if you are looking for child safe nail polish that your kids can play with.
To keep things simple and more organized, here are some colorful and creative art ideas using nail polish that you can do with your kids.
- Nail Polish Painted Sunglasses
If you have an old pair of sunglasses lying around, why not give it a new life through a fun nail polish art activity? Teach your kids how to transform old sunglasses by giving it a unique splash of color using nail polish. Not only do they get to have some art fun, but they even get cool sunglasses at the same time! You can even have a design theme for the sunglasses. For example, you can use black and orange colors to make if you want to go with a Halloween theme!
Here are the materials that you need: Sunglasses, nail polish (different colors), Q-tips/toothpick, nail polish remover, clear topcoat nail polish.
Here’s the step-by-step guide:
- Using a Q-tip, dot some nail polish on the rim of the sunglasses. You can use as much color as you like, just mix-and-match. If you feel like you made a mistake, use some nail polish remover (careful not to put too much too—precision is key!) You might need to apply several layers of color depending on the consistency of your nail polish.
- After you are satisfied with the dotted colors on your sunglasses, you can proceed with sealing it with a clear topcoat nail polish.
- Just let it dry, and you are done!
- Marble Painted Mugs
Just like nail polish painted sunglasses above, you can also use nail polish to decorate any mugs you have. You can use these mugs as cute containers for your kids’ pencils, pens, and other drawing materials. Kids can come up with all sorts of cool designs with this activity.
Here are the materials that you need: Mugs, nail polish (different colors), Q-tip/toothpicks, disposable container
Here’s the step-by-step guide:
- Fill a disposable container halfway with hot water.
- Pour two drops of nail polish into the hot water. Make sure that you gently pour it so that the polish stays on top of the water.
- Use a toothpick to swirl the polish in the water.
- Dip the mug in the water, and you will see the nail polish attach itself to the mug.
- Allow the mug to dry.
- If there is any unsightly excess nail polish, you can use a nail polish remover.
- Enjoy your marble-painted mug! Remember that these are not microwave or dishwasher-safe, so clean these mugs manually to prevent the polish from chipping.
- Design Pencils with Nail Polish
In this art activity, you can use nail polish to decorate pencils. Looking for an easy art activity to do with kids? If you have pencils lying around the house, why not give it a new life with a creative design? Kids will love learning how to write with their “new” pencils!
Here are the materials that you need: Nail polish (You can even use the glittery ones!), unsharpened pencils, Q-tip/toothpicks, clear topcoat nail polish.
Here’s the step-by-step guide:
- Using the wand of the nail polish, paint the entire pencil, and let it dry.
- After it dries, you can add a layer of decorations using Q-tips and toothpick for precision.
- Remember to sharpen the pencil only after it completely dries.
- Enameled Spoons
Brighten up snack time with the kids, and add colorful faux enameled spoons that they can use! Your kids will enjoy eating when yummy snacks are on pretty plates that even come with pretty spoons! Good thing your kids can easily use nail polish to make faux enameled spoons. They can have fun doing art first, then have snacks later!
Here are the materials that you need: Stainless steel spoons, nail polish, clear nail polish top coat, microfiber cloth, Q-tip/toothpicks.
Here’s the step-by-step guide:
Ensure that your spoons are clean and dirt-free. Dry your spoons with an absorbent microfiber cloth.
- Apply two coats of your chosen nail polish. You can either paint the entire handle or just half of the handle of the spoon. Note that you might need to apply additional coats depending on the consistency of your nail polish.
- Apply a layer of your decoration. If you want to layer it with some glitter polish, you can do it during this step. You can also add some decorations by dotting nail polishing using a Q-tip or toothpicks.
- Apply a clear nail polish top coat. Make sure that the first three layers are completely dry before applying the topcoat. This is a necessary step to add durability to your paint.
- Dry your spoons overnight.
- Enjoy using these on your table! Remember that these are not dishwasher-safe, so only wash them manually to prevent the paint from chipping. Nail polish is also not food-safe, so avoid letting the painted part touch your food.
- Rainbow Paper
Who doesn’t love rainbows? Seeing rainbows is an easy way to cheer up people. It’s also a great way to teach kids about color. Did you know that you can use nail polish to conduct easy experiments that will have kids creating their own rainbow paper?
Here are the materials that you need: A bowl filled with water, clear nail polish, rectangles of black construction paper or black card stock (about 3-5 inches long on the sides), paper towels
Here’s the step-by-step guide:
- Drip one little drop of nail polish into a bowl of water.
- Wait for 10-15 seconds, then dip a piece of black paper into the water and pull it out again.
- Once the paper is dry (after a few minutes), tilt the black paper in different directions to see the rainbow patterns appear. Hold it next to a bright window for best results!
- Do these as many times as you want, and see the different rainbow designs that you can come up with!
Have fun with art
Want your kids to have a fun day playing with nail polish and learning at the same time? Why not throw a party and add awesome arts and crafts activities? All you have to do is to set up a table with bottles of nail polish, stickers, art pens, glitter, mugs, pencils, and all sorts of coloring materials that they will need. Remember to use safe nail polish that is made especially for kids, such as Snails nail polish, so that you have nothing to worry about when they do any of the fun art activities in this list!